- Storage
Network Disks
Network Disks are an innovative solution for businesses that require additional storage space for their instances. Unlike traditional storage solutions, our Network Disks are network-based, enabling access from anywhere in the world with an internet connection. This eliminates the dependence on physical storage devices and facilitates easy scalability as your business expands.
Network-based disks can be attached to any instance within the same data center at any given time.
How to create a network disk?
You can add your network disks to your system either during the instance creation process or after creating the instance while it is in a stopped state.
 To configure your disks, please follow these steps:
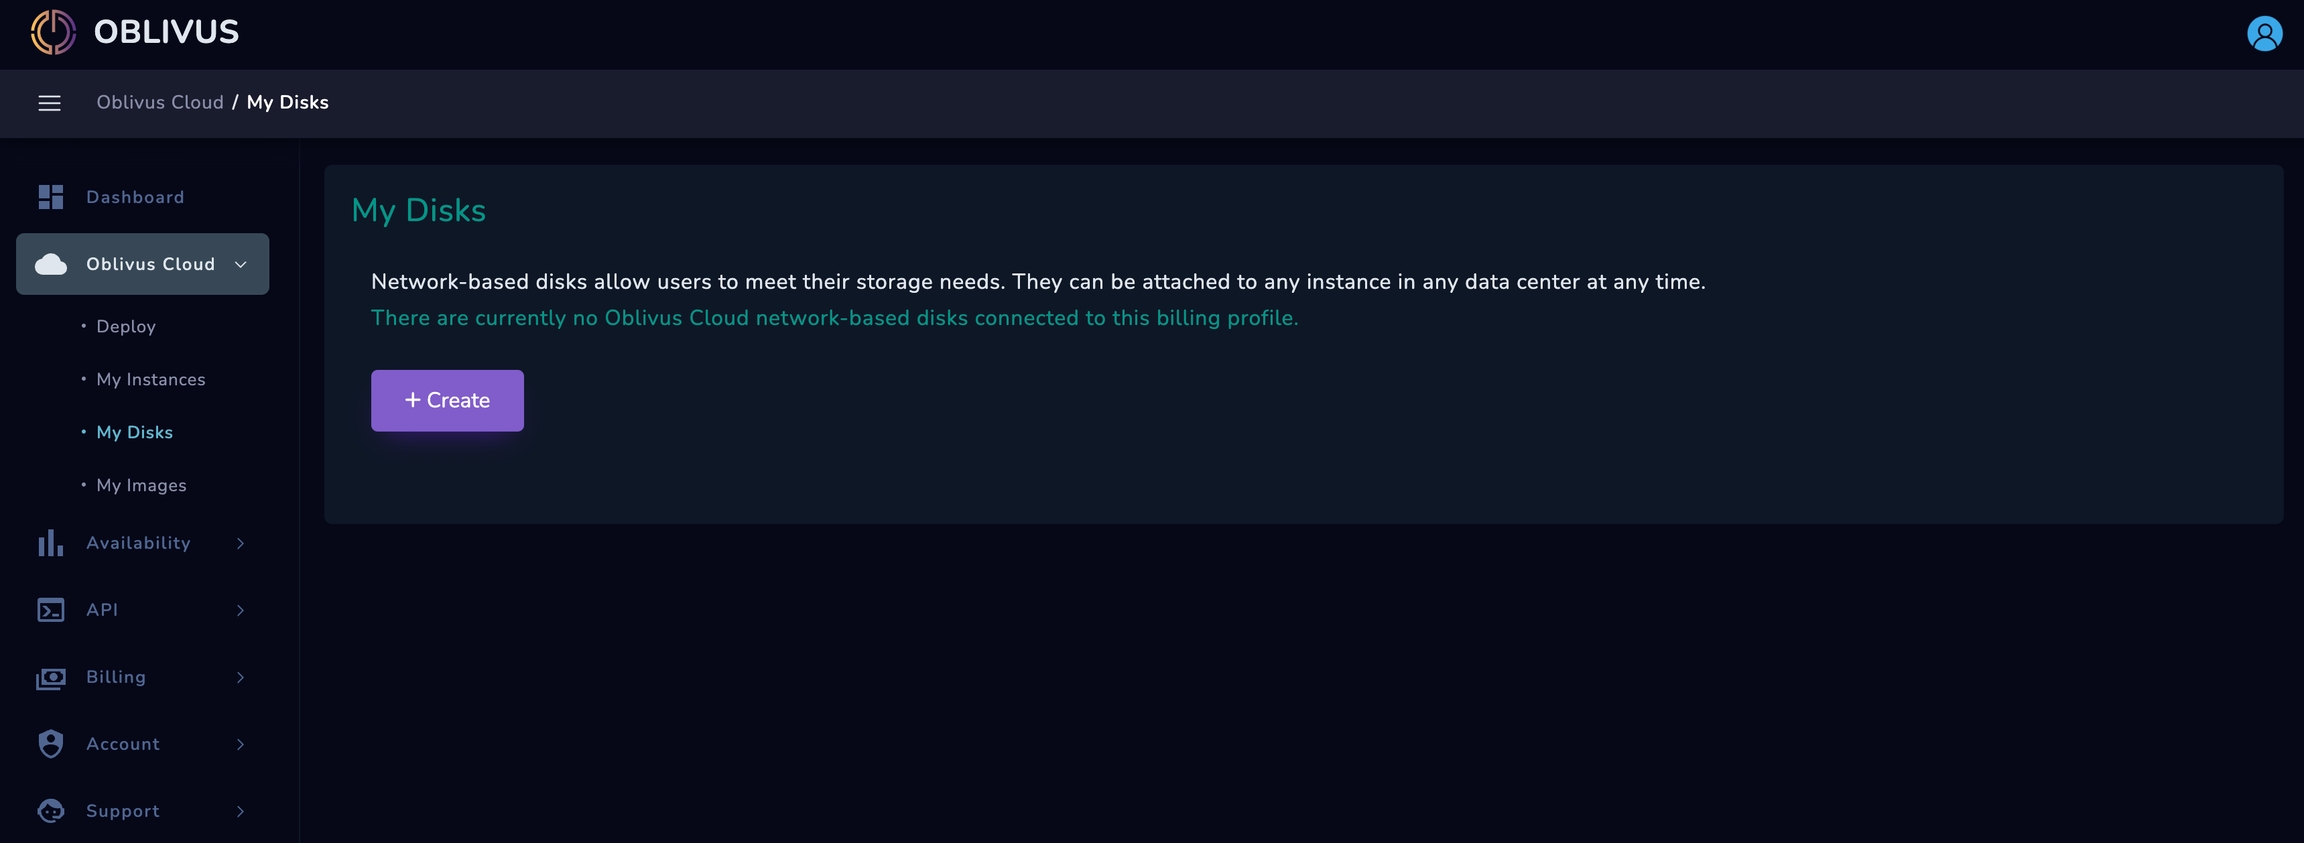
First, go to the "My Disks" section on the left-hand side of the screen. Then, Click on "Create" to begin configuring your disks. (You can also create or attach your network disks when you are creating an instance!)
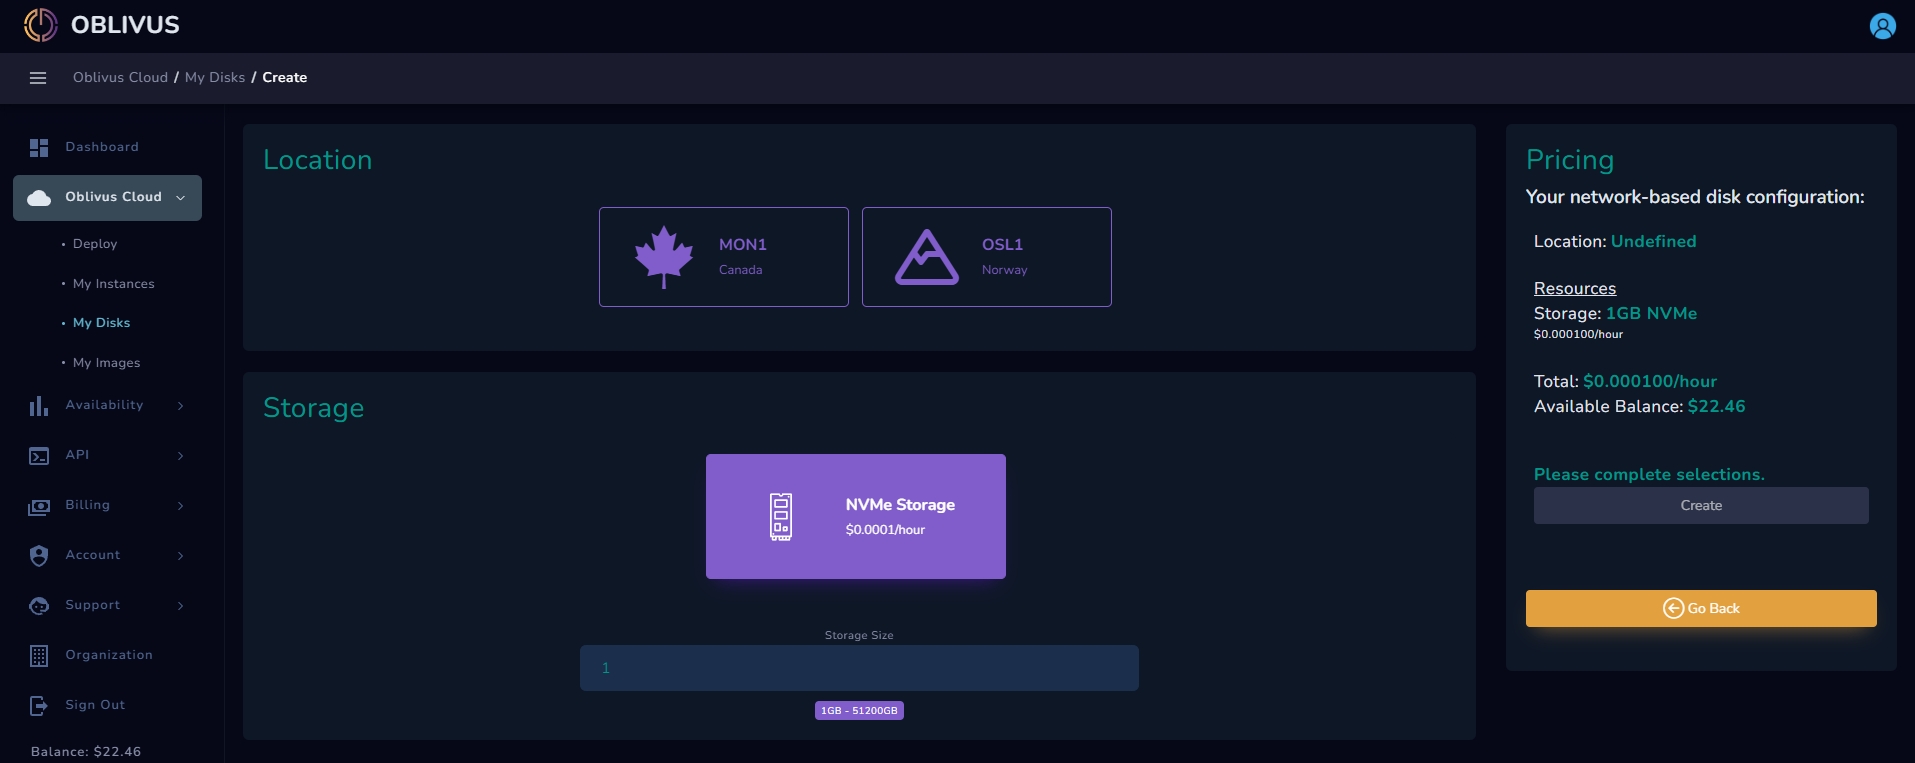 At Oblivus Cloud, we provide NVMe SSD disks for optimal performance. These disks offer faster read and write speeds than traditional HDD disks, which can significantly improve the performance of your instance.
Once you have decide on the appropriate disk size, you can then set the capacity of your disk and click the "Create" button to finalize the creation of your disk.
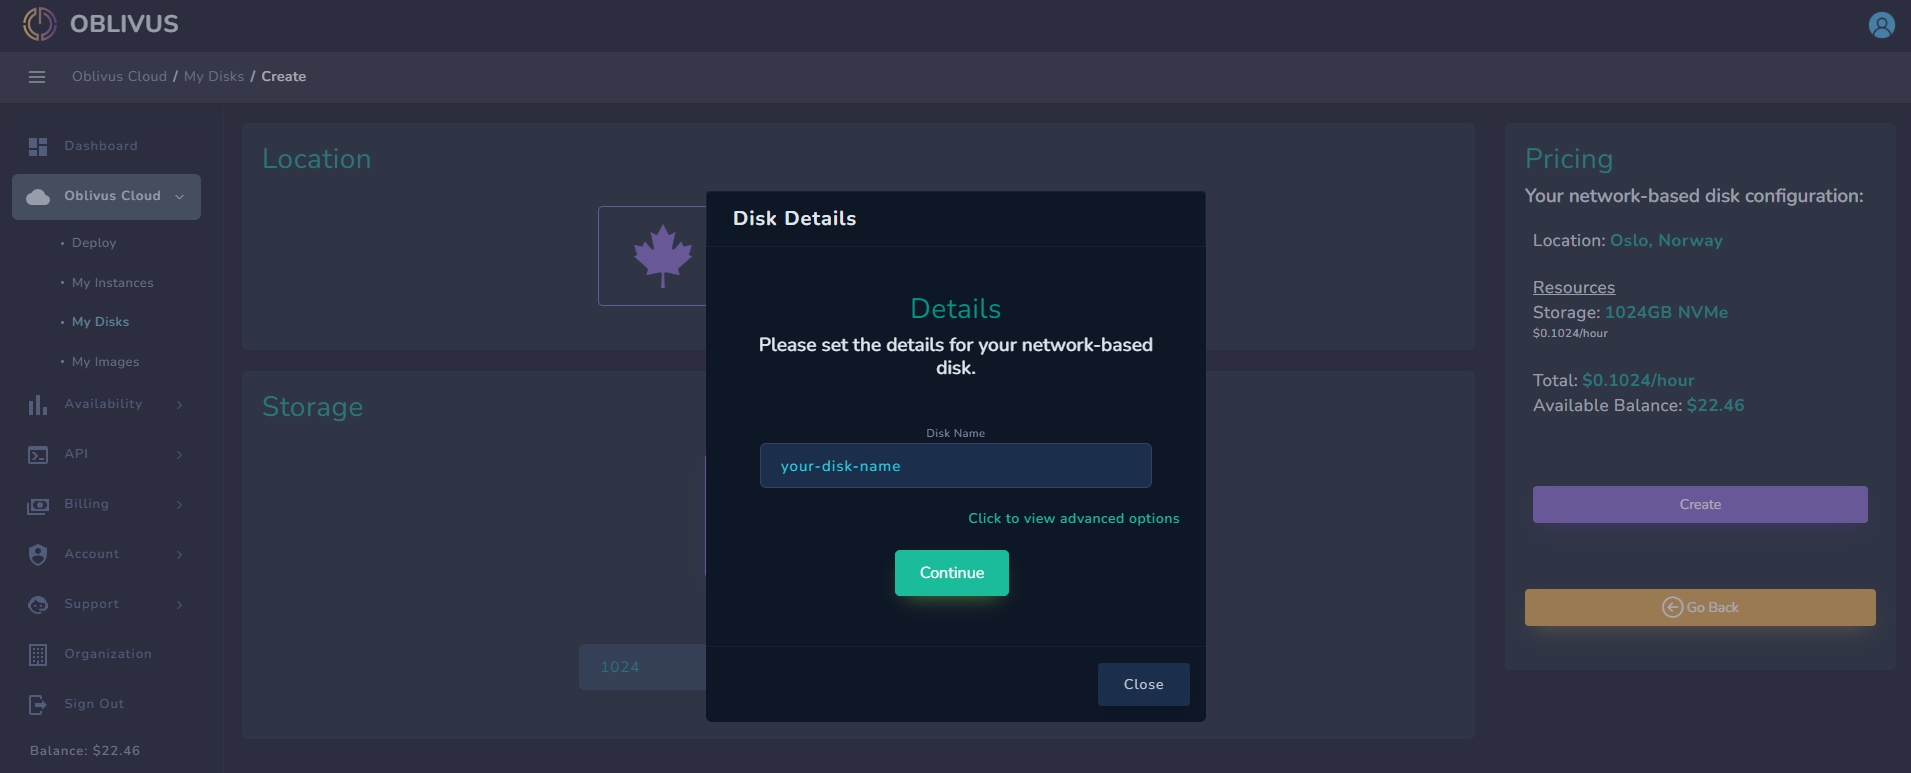 After creating your disk and selecting its size, location, and type, you will be prompted to give your disk a name. Once you have named your disk, you are good to go!
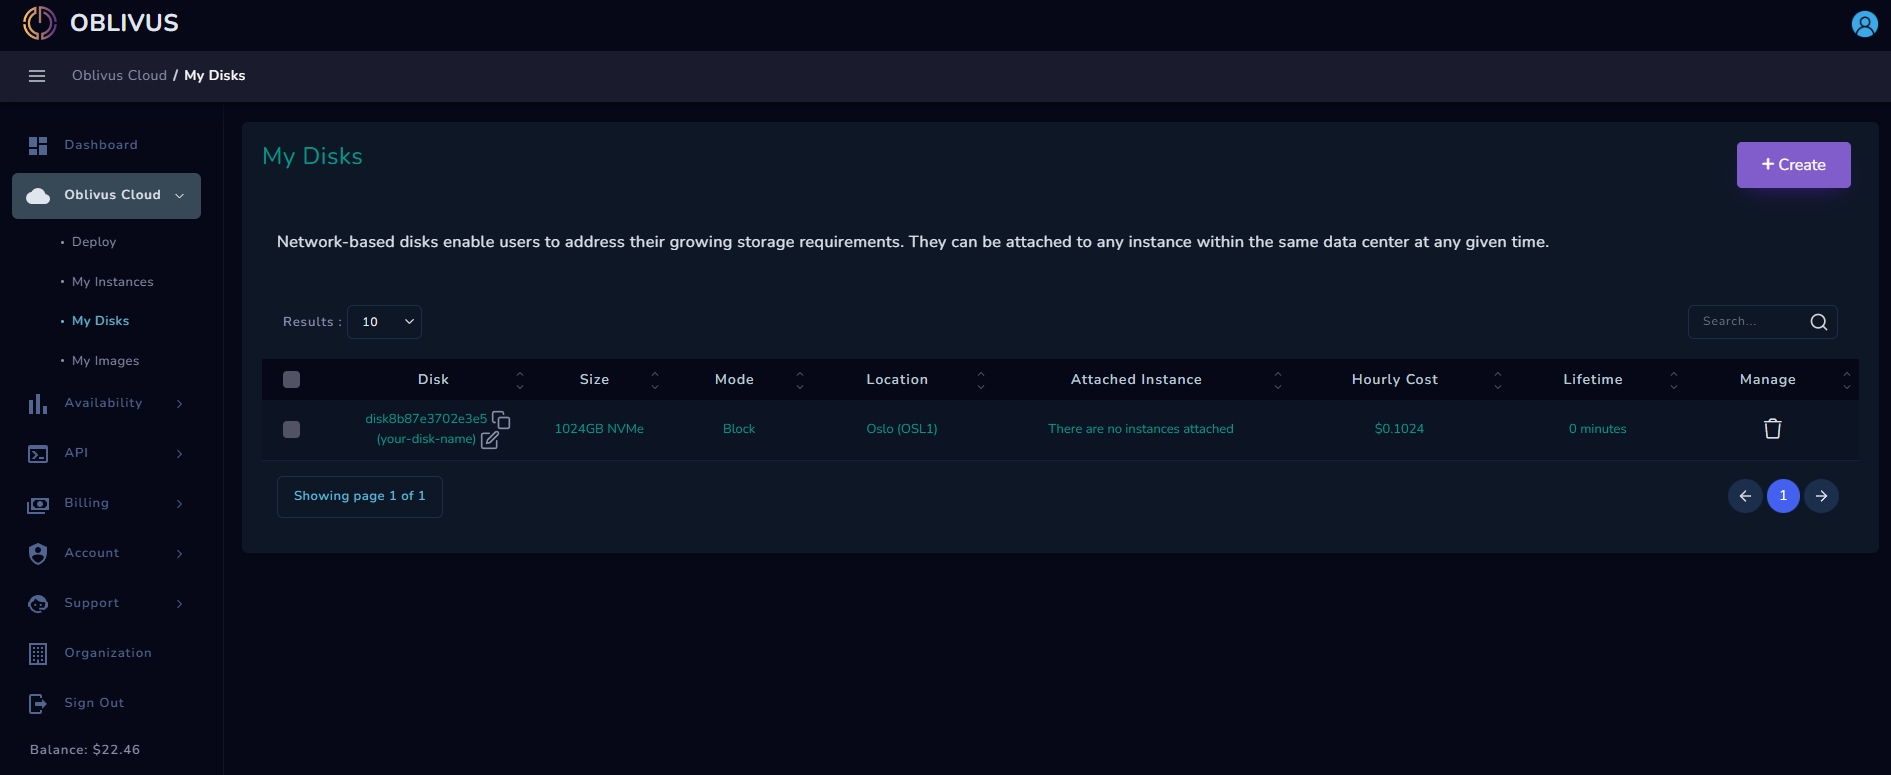 After creating a network disk, you can manage it from the "My Disks" page.
Last updated 1 year ago